October 31, 2014

Looking Glass Tester


Cheryl over at Meadow Mist Designs asked for testers on one of her latest patterns. Of course, I volunteered. The pattern is called Looking Glass and will be up for sale on her Craftsy site. 


Here are some things I loved about this pattern ... 
  • Quick and easy to assemble,
  • The whole top was constructed in one afternoon,
  • The directions are for both charm squares and layer cakes,
  • Directions for a variety of sizes (baby, lap, twin, and queen), 
  • Super easy to chain piece, 
  • You do not have to stop and iron frequently,
  • Great way to use up pre-cuts with no plans. 


For mine, I had a bunch of layer cakes with no purpose just hanging around so I settled on on Honeysweet by Fig Tree. The quilt is lap sized and required 30 squares in total, plus 1.5 yards for backing (Kona Snow). The remaining squares will get pieced into the backing. So far I really like my choice in fabrics :) Now I just need to find a backing and a binding so I can finish this one! 

- Patch & Chels

October 28, 2014

Quilt Bloggers Festival - Entry


Ok, I went back and forth as to enter a quilt in the Quilt Bloggers Festival over at Amy's Creative Side. This will be my first time entering my quilts into any type of competition. To sum it up, it's really quite nerve-wracking! I decided to enter my Modern Maples quilt into the Small Quilt competition.  Head over to the links to see all the action. Voting starts next week! 


October 26, 2014

Doubling Up


This year I have been o.b.s.e.s.s.e.d. with the Sugar Block of the Month club from Stitchery Dickory Dock. Each month Amy has came out with great patterns. I am so in love that I am making a twin sized quilt from the January block for my sister!


While creating October's block I realized that at the end of the year that would only be 12 blocks and with sashing would amount to a baby quilt or a very small throw after adding a border. This just wouldn't do! I ordered more secondary fabric and cut into my stash. I went back and made doubles and sometimes triples of each block, with the goal of 30 blocks by the end of the year.  Right now there are 24 done.  Whew! 


Every time I lay all these blocks out I fall in love in a little more. Only 6 more to go!

-Patch & Chels

October 22, 2014

Dress Dyeing

Disclaimer: This post is not about quilting but an adventure in dying clothing and is wordy, be warned!

About 5 years ago I bought a bunch of bridesmaid dresses from J. Crew during a clearance sale, they each cost $20 - $30 each and where originally about $180. A great deal I couldn't resist. These two were both a very pale pink, and ended up looking horrible with my skin tone. Not even sure why I would buy these colors! After doing some research on dying fabrics, this weekend I finally overcame my nerves and dyed them both. Here is the before photo.


The dress on the left is the perfect fit all girls dream about and is all cotton. The dress on the right also fits great but is silk. According to the tutorials silk is harder to dye, so I didn't have high hopes. Rit brand dye had the best reviews, was the oldest, and cheapest. I chose the colors teal and wine, in the liquid format. To dye the fabrics I picked up a couple cheap plastic trash cans, if the dye stained them it wouldn't be a loss. I also used the whole bottle of dye instead of the 1/2 bottle in the directions and only used about 2 gallons for each dye, just enough water for the dresses to move around freely and be covered in liquid. This made the solution stronger and the final result more vibrant. 


I first took the wine colored dress (silk) out of the dye after two hours of soaking and realized the color was not even after the dress was washed. Conclusion: need try to re-dye and keep in the dye longer? It got a new dye bath this time staying in all day and night (24 hours total). Probably not the best for the silk but at this point it was already "ruined" and worth trying to save. Well, it was worth the re-dye. The second time it came out awesome. The dress shrunk up in length, so the slip will need to be hemmed but that is the only issue! The color came out nice and rich and looks great with my skin tone. (Sorry I have no photos of me in the dress, it was too cold out to futz with the timer!)


The teal colored dress (cotton) stayed in the dye overnight, about 18 hours total. Each hour, the dress got moved around to assure the dye was reaching all the fabric. The next morning it got rinsed and washed. The results were amazing. In one night this dress went from never will wear this, to when is my next formal event?!  There are some spots the color didn't take as well. These are only notable when really looking at the fabric. The natural sheen of the fabric makes it hard to tell even in direct sunlight. Conclusion: keep dress in dye for at 18 - 24 hours although the directions say 30 - 60 minutes! The silk sash didn't take the dye well, but I really like the marbling affect. 


You can see in the picture how close the original color is to my skin tone ... eek and I am still sporting a tan from this summer! Overall, this project was a huge success.  I now love both dresses, they are fun colors that work well with my pale complexion. The Rit dye was easy to use, although use gloves because it does stain skin. My left hand has had a wine color tint for a day or two, oops. Now I am wondering what else I can dye?  

- Patch & Chels

October 19, 2014

Sunday Stash

Ok, it's about time I participated in the stashing of awesomeness! This year I have vowed to keep my stash under control and have done a decent job at cutting back the amount of fabric on hand. Over the year more fabric has been quilted than bought (hello motivation). This week has been an exception, I picked up these FQs at my LQS. Also, more damage was done at Sew Fresh Fabrics going out of business sale ... but those won't arrive for a while. After all, it was on sale. More on that later.


The funny thins is, the older I become the more of a minimalist I have become. Quite frankly, it's getting pretty scarce in my world and I like it! So unlike most quilters, the (small) amount of fabric I do have on hand is actually too much!  Right, I am an anomaly you can start the flogging right after this post. When I go through my stash and dig out boxes I just become overwhelmed, so I have learned it best to leave it all hidden away. 


Now, I need to get quilting on my WIPs so I can cut into these new lovelies. Thanks Molli for hosting this great link up each week ... of course I am linking up to Molli Sparkles :) The button was also added to my sidebar.  Yay, to new blog bling!

-Patch & Chels

October 16, 2014

Tone it Down! Update ...

First of all... the WINNER of Mondays giveaway goes to ....


Teresa if you could e-mail me your address, I'll get these in the mail!


You all had AMAZINGLY nice things to say, this week has been kinda crazy at school with grades being due ... eek.  Rest assured that I read each and every comment, although I didn't respond (sorry poor manners).  Thank you again for making this blogging journey such an awesome experience!


Now on to regularly recorded blogging ...

It's official the packages have arrived and Michelle (From Bolt to Beauty) and I have sorted them into 28 perfect little bundles of fabric for you all :). Michelle is mailing them today or tomorrow. There wasn't one bad fabric in the bunch and that is saying something. Every time Michelle would reach for a new bag of fabric I kept getting giddy with delight. I have seen most on our Flickr page but seeing them in my hands was just so much better! 

Now I just need to come up with a plan to use them, my mind is racing and it's difficult to settle on just one idea. We are encouraging people to post what they make from their packs in the flickr group so we can see what all these magical squares become! Here are some fabric highlights or fabrics I got exceptionally giddy about ... 


Lately, some of my peeps have been asking about finding low volume fabrics, here is a linked list of some low volumes I am currently loving.

Almost every line of fabric has at least one low volume print, the key is finding them because they don't always draw you in with beautiful prints and colors. Most fabric sites allow you to look by color way, so searching whites and creams brings up most fabric that would be considered low volume. Some sites even let you search low volume! I try to get a selection of both cream and white backgrounds to add to the scrappy look.  Also very pale tan's and gray's add some pizzaz.  


Also look at the goods Michelle gave me for helping organize the swap! I am thinking Christmas gifts from this book. 

****If you missed this round Michelle and I were already talking about doing another swap this winter after the holiday.  We are not sure of the theme yet, but stay tuned!

-Patch & Chels


October 13, 2014

100th Post Celebration + Giveaway

Hello my blogging friends, today I announce my 100th post on the blog :). (Very Exciting!!!!) I started this blogging adventure back in January and never would have guessed how amazing the whole experience would have been. It blows me away every time I think of the wonderful quilters out there who have become new friends. You all rock! As a little thank you I am hosting my first giveaway today. A little bundle of 6 fat quarters.


In the giveaway pile is a custom FQ bundle, including some of my favorite prints! All you need to do is become apart of Patch and I's blogging world, either by, becoming a member of the site, or following us on Bloglovin'. Then leave a comment below.  The winner will be chosen at random on Thursday of this week. 

-Patch & Chels


October 10, 2014

Round Trip Quilts

It's time to share Border 2 for Round Trip Quilts! This center came from Sew Mary Quilts. It has an awesome gradient rainbow star to work from! I had to do something with color families to play into what she already started in the middle. Mary sent a small notebook full of ideas for borders, and I feel in love with the idea of an arrow. 


Having never sewn arrows and needing a pattern that would fit perfectly to the 16.25 inch side, I grabbed some graph paper and kept my fingers crossed it would work out. I laid out the parts for four arrows, one for each side. Each arrow has two of the color families from the center block. The proportions worked out well perfectly, each arrow wasn't too long or too short. 


I was stumped on the corner block, so I sent out an Instagram SOS. They gave me the great idea of a four-patch that ties into the already established corner blocks.  


Now I need to write in the notebook sharing my ideas and design for the newest border! Hopefully Mary likes what has been added to her block :) The block is now headed to Christina at Wips & Tuts

-Patch & Chels

October 07, 2014

9(9) problems but a {stitch} ain't one!

PSA: I just have to start by saying this community of bloggers is probably the most compassionate, kind, and thoughtful group of human beings on the planet. You are encouraging and always say the right things to make me feel better, mind and body. Last post, I talked about finding peace with some big decisions in my future. I have worked out my thoughts and come to a decision. It was amazing how quickly the stress melted away, and I feel this choice will make the happiest. You were all so great with your well wishes :) Thank you for being so wonderful, I feel blessed to be apart of such a great network of quilters and friends.

Now on to regularly scheduled blogging ... 


Amy over at 13 Spools has done it again! I admired her courage to air 10 of her quilting confessions now she is sharing 9 #quiltersproblems. The problems in life quilters only seem to understand. Here goes my 9 problems ... although some days it feels more like 99.

1. Running out of bobbin thread in the last 2 inches of your project. 

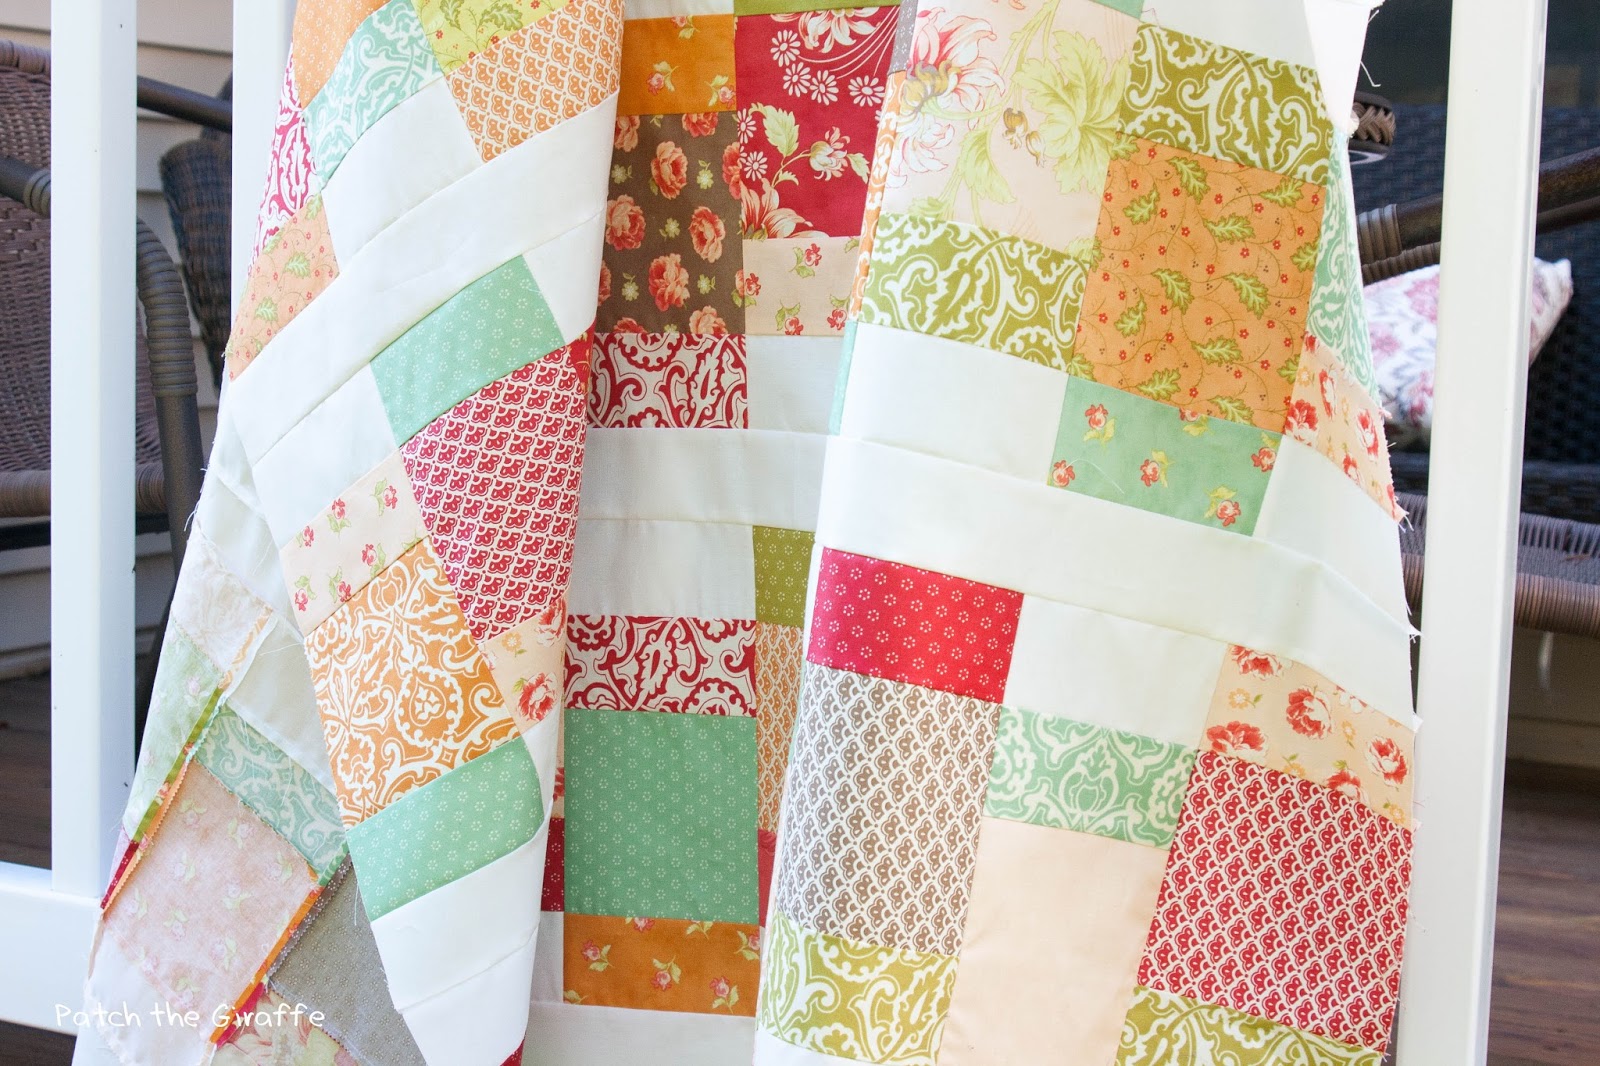
2. Taking a quilt into the sunlight only to find out all whites are not the same shade.  

3. Being inches short on a backing (really hate being inches away from anything!)

4. Realizing the backing fabric has a bunch of puckers after completing 90% of the quilting.

5. Getting halfway through a project only to realize it's ugly, dreadful, and/or putrid.

6. Tension on the machine is off and spending a whole sewing day futzing with the thing before beating the machine back into submission, not before completely cleaning and oiling every part hoping it helps or any sewing machine troubles, really.

7. The love/hate relationship with the seam ripper.

8. Drowning in WIPs while starting another project frantically cutting with a dull rotary blade.

9. Realizing a piecing mistake in the middle of the quilt only to have to take the whole top apart. 

If you want to share your #quiltersproblems link up to Amy's post so we can all commiserate with one another!

-Patch & Chels


October 04, 2014

Be ... Peaceful (with Some Pretty Backdrops Tutorial)

This month is all about finding peace in our lives. The funny thing is that is exactly what I need to find. Lately, I have been presented with some big choices about my future and it has created somewhat of huge headache of stress in my life. Decisions I thought I had more time to make, just like anything in life I do not. There is always the "what if's" about my future as well, what if this was the wrong choice, what if the other option would have propelled myself further. Do I look back in twenty years and have regrets? Ah, what I would do for a crystal ball! 


Enough about that, it's stressing me out just thinking about the ordeal. Ok, serious discussion about backgrounds in photography. May times I get kudos on my pictures, if you want to learn how to better operate your camera I highly recommend Ruth's posts at Charly & Ben's Crafty Corner. Ruth does a whole series about taking better pictures, and it has helped me A LOT. I still don't shot full manual but I am having better luck on the "P" mode, which is half manual mode. 

The problem with creative photos is, I rent, so I have limited options as paint and wall space, but still want interesting photos! Here was my solution. The background above is the one I use the most. You can purchase this board at from Home Depot, they have a variety of textures. That piece is  left over from the prop below, two backdrops for $10, winning!

Rainy day .. the lighting stinks!

My father is handy with the table saw so he helped (actually he did all the work). The design was simple. The boards, with strips of wood nailed to the back so you can clamp the two pieces together, using basic Home Depot clamps ($5 each, and already had a pair I use to clamp quilts to my quilt frame). When the prop isn't in use, it unclamps and stores behind the couch out of sight. If you're not so handy with a table saw, or terrified of them, Home Depot and Lowes will cut boards for you. Just give them the dimensions :). 


Ta da, a simple background that stores flat! You can see the stash of Sugar BOM fabrics is getting slim.  This month I also cut out a second block for each month, twelve wasn't going to be enough so I doubled up :). More on that later. The white background is BRIGT, so I was able to shoot this picture in low light on a rainy day without too much photo magic!  If you want brighter photos start with a brighter background.

The background helps overcome bad light!

Now for color! Pantone's radiant orchid is the color of the year, but really who wants a wall of it?  Eeek, that might be TOO much!  Here was my color solution.  I picked up two 24 inch square boards at Lowes, they were cheap with imperfections at $4 each, and some 4 inch foam rollers ($5 a pack and used 2). In this project I used left over paint and primer or already purchased paint.  If you want a particular color, I recommend the sample size jars, they are small and cost about $3 each.


Then I primed and painted BOTH sides, giving me four background choices. Lately, I have been having fun with the radiant orchid! The good thing about painting the boards they can quickly be changed. To photograph using the boards, just lay the blocks on top and stand over to shoot. It also takes away the step of hanging/taping/pinning the block to a wall. Much faster and easier. The hard part is choosing which color to use!  These also store flat behind a couch when not in use.


All these options cost at total of $35 dollars, if you need paint it's more like $50, for all 6 backgrounds! This is blogging on a budget ($5.85 each!). If you have any questions about the process, shoot me an e-mail I would be glad to help!

-Patch & Chels